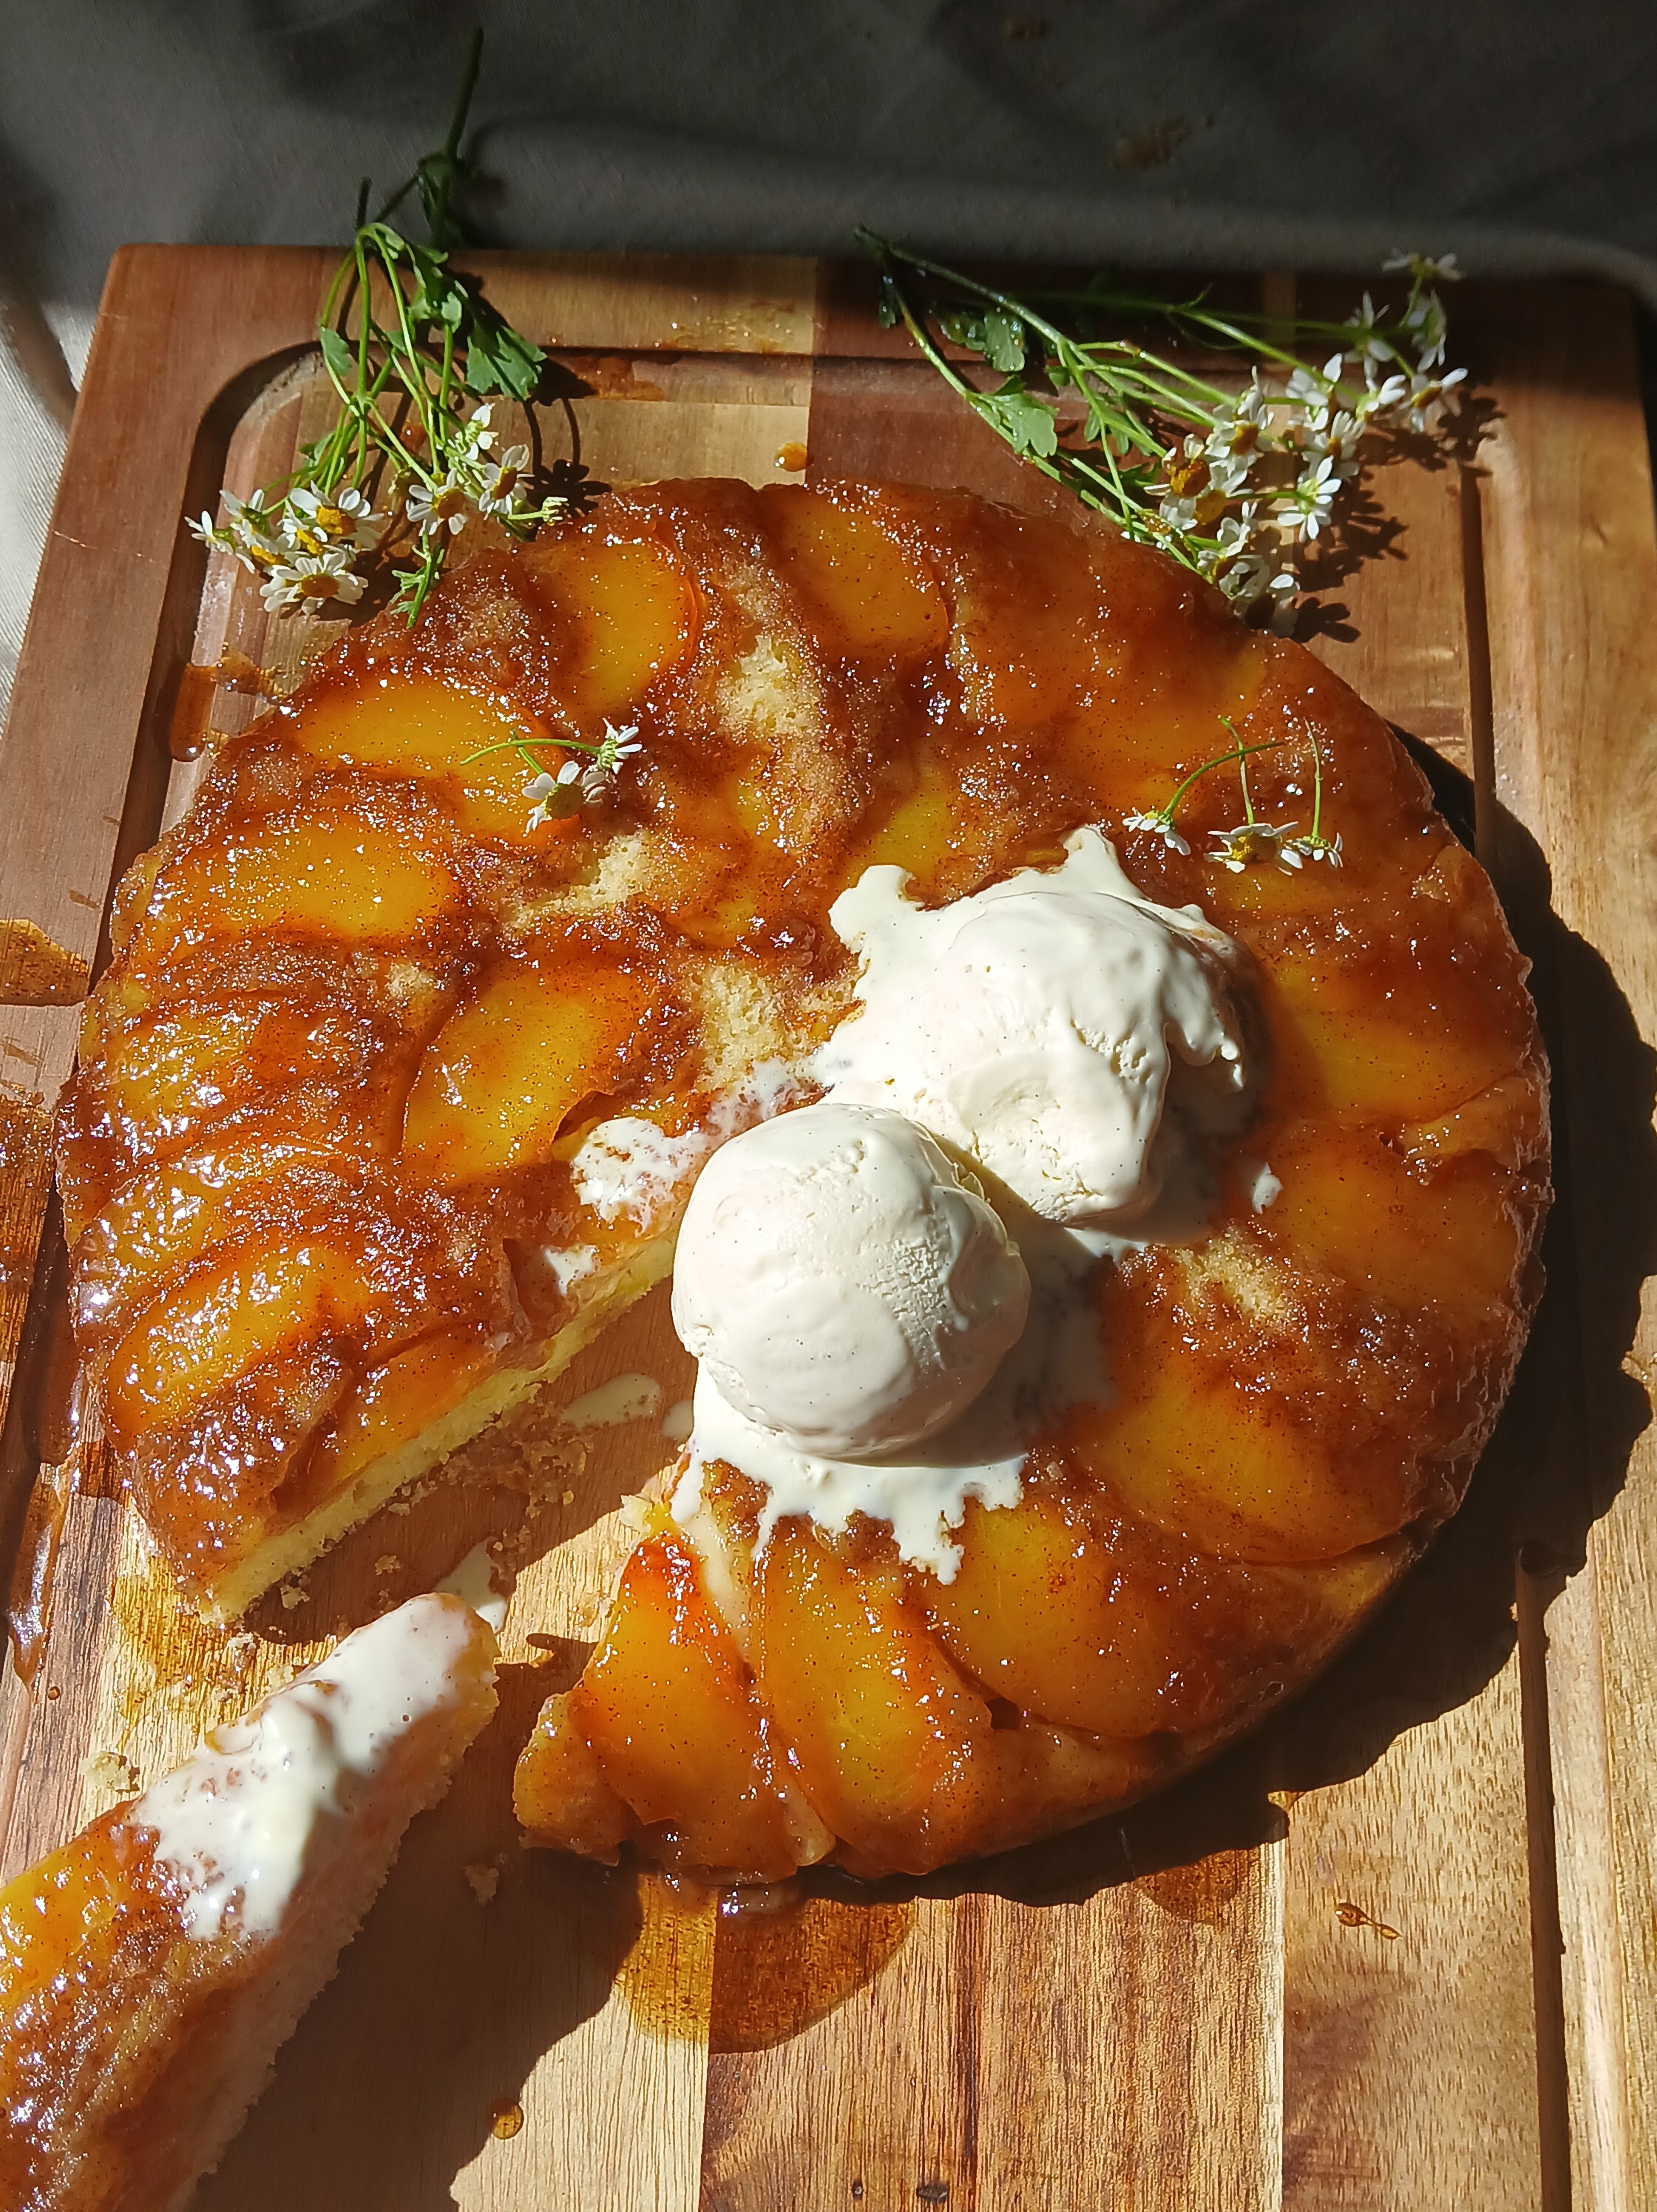
This cake is slightly nutty from the brown butter. Baked in a skillet with fresh peaches, brown sugar, honey, and cinnamon. Think pineapple upside down cake meets peach cobbler. Topped with ice cream or fresh whipped cream, it’s the most delectable way to use up those ripe summer peaches.
There’s something about a fresh peach on a hot day that let’s you know summer has arrived here in California. There are many ways to enjoy peaches from cobbler to pies, cakes to ice cream, and the possibilities are endless. One of my all-time favorite ways to use fresh peaches is to make my Brown Butter Skillet Peach Cake. Using a skillet helps to caramelize the peaches when they bake in the oven. Once inverted, the sweet caramelized peaches top a soft and tender slightly nutty cake.


Blanching and Peeling Fresh Peaches
The easiest way to peel a fresh peach is by blanching them. Start by cutting an X at the bottom of the peach, being careful not to pierce the flesh too deep. Get a bug enough pot to fully submerge the peaches, fill with water, and bring to a boil. Gently drop the peaches and boil until the skin starts to lift away from the peach. This should only take around 10 to 20 seconds. Using a slotted spoon, carefully remove the peaches from the boiling water and place it in an ice bath. When the peaches are completely cooled, you should be able to peel the skin from the flesh of the peach easily. To slice your peaches, cut around the pit and twist to open. Remove the pit from the center of the peach and slice about 1/4″ thickness. If your peaches are too ripe, this step will be harder to do as your fingers will likely bruise the peach. In this case, cut individual slices from the whole peach, cutting around the put and removing each slice one by one.


Classic Sponge Method
I wanted a cake that was going to be able to hold its structure while also soaking up all that juicy, peachy goodness, without falling apart. A sponge cake is the perfect vessel for doing exactly that. I wanted to add a subtle twist by browning the butter for the cake as well as the sauce. I decided to brown them separately because I wanted each component to have an equal amount of brown butter. When you brown butter you are essentially heating the butter up enough so that the milk solids separate from the fat. The milk solids will start to cook and brown creating a slight nutty flavor. Careful not to overcook your butter as it will result in a burnt and bitter flavor. The best way to separate your brown butter is to let it cool completely and then separate as needed, Since I didn’t need to use cooled brown butter i decided to make it in two separate batches.


Brown Butter Sauce and Fresh Peaches
I decided to make the brown the butter sauce in the same skillet that the cake was going to bake in. Starting the sauce on the stove helps to get the cooking process started on the sauce which ensures a nice caramel like topping when the cake is inverted. No crunchy brown sugar topping here!

Serve warm with vanilla ice cream
Cake Ingredients
1/3 cup Brown Butter (slightly cooled)
1/2 cup Sugar
2 Eggs (separated)
1 tsp Vanilla
1/2 tsp Salt
1/2 cup Greek Yogurt or Sour Cream
1 3/4 tsp Baking Powder
1 cup Flour
1/4 cup Sugar (whip with egg whites)
Brown Butter Sauce
1/3 cup Brown Butter
2/3 cups Brown Sugar
2 tbsp Honey
1/4 tsp Ground Cinnamon
2 whole Peaches (peeled and sliced)
Directions
Preheat oven to 350 degrees
Start by browning the first 1/3 cup of butter. Place the butter in a saucepan and put on medium heat. Allow the butter to slowly melt. You don’t want your heat on too high as it could result in your butter burning. This is more of a gentle simmer where you are allowing the milk solids to separate from the fat and slowly cook to a light golden brown. The butter will start to foam at the top and I like to gently stir at this stage to allow the butter to brown evenly. The butter will have a slightly nutty smell and be golden brown when it is ready. Remove butter from heat and allow to cool. The residual heat from the pan will slightly keep browning your butter so I always take it off at a light golden brown, and its perfect every time.
While the butter cools, I like to blanch and peel the peaches. This step is completely optional, but I prefer to have peeled peaches rather than skin on for this particular cake. Now you can just straight peel the peaches without blanching them, but you will take off more of the flesh as opposed to blanching them first the skin will easily peel off taking off almost no flesh at all. Start by cutting a small X at the bottom of the peach, making sure not to cut too deep into the flesh. Fill a pot with enough water to completely submerge the peaches. Bring to a boil then, slowly drop the peaches into the boiling water and let sit until the skin starts to break away from the flesh. This should take only 20- 30 seconds. Remove peaches from boiling water and place immediately into an ice bath. Allow the peaches to cool then, gently remove the skin from the flesh. If the peach is perfectly ripe you should be able to cut around the pit of the peach and slowly twist the peach in half and remove the pits. Then slice in 1/2 ” slices. If your peaches are overly ripe like mine were that’s ok too, just slice directly around the pit and remove each slice individually.
Now should be the perfect time to start the batter. Add the cooled browned butter to the bowl. Add the sugar, salt and baking soda to the bowl and cream the butter and sugar mix until light and fluffy. I know most people add all of the dry ingredients together, but I cannot tell you the amount of time I have forgotten to add something so I over the years have found if I add them in the beginning with the sugar nothing gets left behind. Ok, once the butter and sugar are nice and fluffy add the egg yolks one at a time making sure to scrape the bowl after each addition. Then, add the greek yogurt or sour cream with the vanilla and mix until combined. Slowly mix in the flour until the batter comes together making sure not to overmix. Scrape the bowl and set aside.
Place the egg whites in a very clean bowl. Whisk on high until they start to get foamy. Slowly add in the remaining 1/4 cup of sugar and whisk until medium stiff peaks. Gently fold into the brown butter batter until fully incorporated, making sure not to over mix and deflate the egg whites.
Heat a 10″ cast iron skillet on medium high heat. Add in your remaining 1/3 cup of butter and gently brown. Once the butter is browned, remove from heat and add in the brown sugar, honey, and cinnamon. Stir in the skillet until combined and evenly covers the entire base of the skillet. Gently add your peach slices in. The pan is hot so work carefully. Be as creative as you like and make a fun design or just toss them on top and let them arrange themselves organically in the pan. there is no wrong way. Pour your batter evenly on top of the brown butter and peach sauce, use a spatula to create an even layer of batter. Place into 350-degree oven and bake for 30 to 35 minutes until fully baked and toothpick comes out clean.
Allow cake to cool for about 10-15 minutes.
Now for the fun part, inverting the cake. Once the cake is slightly cooled you want to invert it or flip it upside down so that all that peachy goodness does not stick to the bottom of the pan. You want to grab a plate that will be larger than the surface of the pan, so when you flip the cake all of the cake stays perfectly intact. Grab pot holders or clean dry towels to hold the pan because i will still be pretty hot to touch. place the plate or serving dish on top of the cake and flip upside down. If everything worked out the cake should just slide on out with very little pieces sticking to the bottom. This cake is best served warm or at room temperature. Vanilla ice cream or fresh whipped cream are the perfect accompaniments for this cake. Enjoy!



Leave a Reply